
Kitchen Remodeling: Part II – The Design Phase
In the previous segment, we discussed the necessary steps in preparation for a kitchen remodel, which included doing research, collecting photos and magazine articles, and making your wish list. Now let’s take that information and apply it to the design phase – the layout and material selections.
In the previous segment, we discussed the necessary steps in preparation for a kitchen remodel, which included doing research, collecting photos and magazine articles, and making your wish list. Now let’s take that information and apply it to the design phase – the layout and material selections.
To illustrate the process, I will use one of the kitchens I have designed and share the journey my client and I took in order to give her the kitchen she always wanted based on her goals.
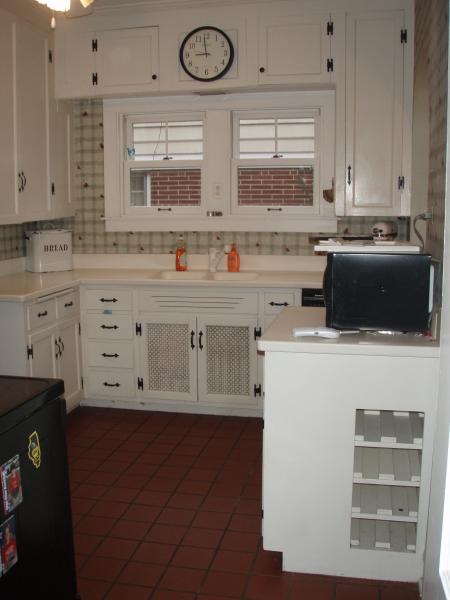
After the initial consultation, where we discussed her wish list and needs and lifestyle, I understood the following reasons why her space did not work:
-Lack of countertop space (one area housed the microwave entirely and there is no landing space to the left of the range)
-Awkward floor plan broken up by hallways, closets and old exterior brick walls
-Not enough storage
-The old tile floor that was hard on her back and was uneven with the rest of the house – not to mention the color, which she disliked
-An inefficient pantry
She also had the following needs/wants:
-Open floor plan
-A bright, yet cozy space for everyday living, yet conducive to entertaining
-Heated floors
-Stay true to the architecture of this 1920s house
-Seating for four, five if possible
-A heavy-duty stove – she cooks all the time
-An area to lounge and do homework
-A spot to hang coats as well as store gloves and scarves
Space Planning
In order to give her the best solution, I explored several different layouts that addressed her requirements. It is critical to prioritize because it is not always possible have everything and your most important needs should be incorporated into the design.
When you have selected a final floor plan, elevations usually follow – so you can see what the kitchen will look like in detail. Often a a 3-D rendering or line drawing is provided to help you visualize the space.
Original Floor Plan
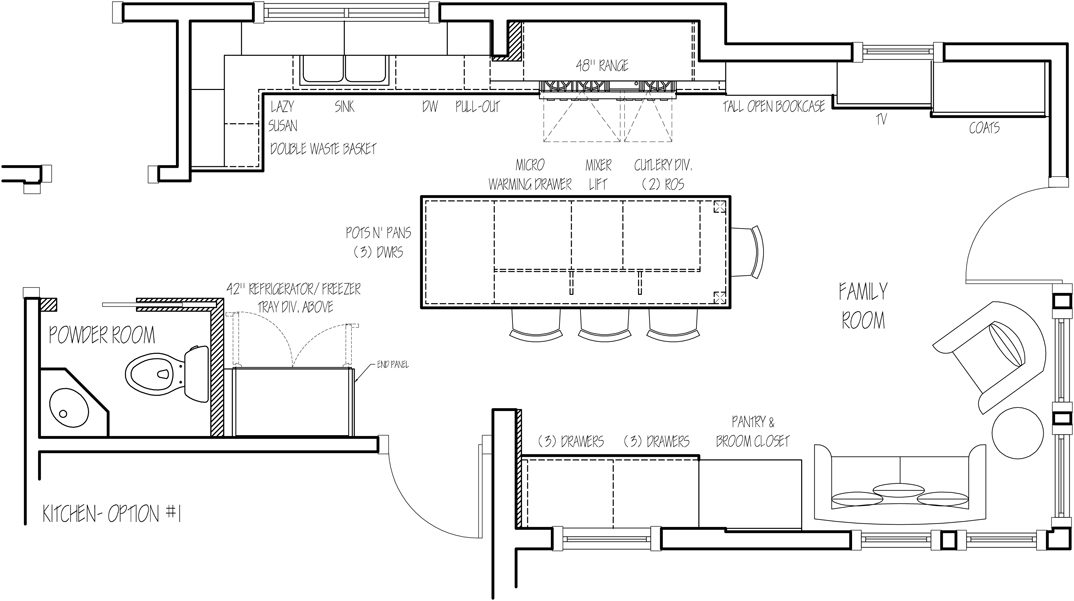
Floor Plan Option 1
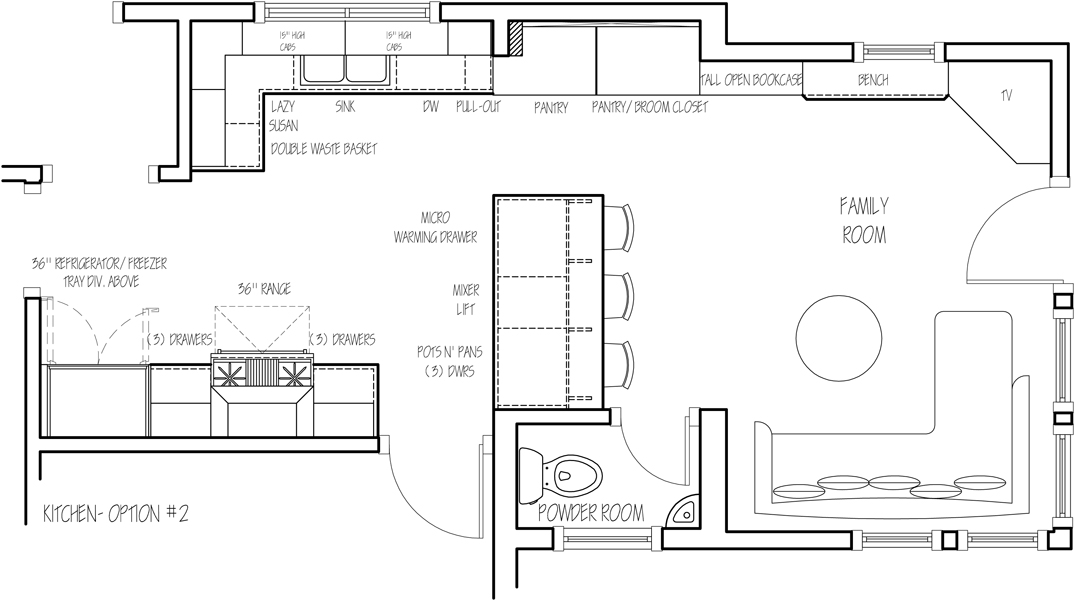
Floor Plan Option 2
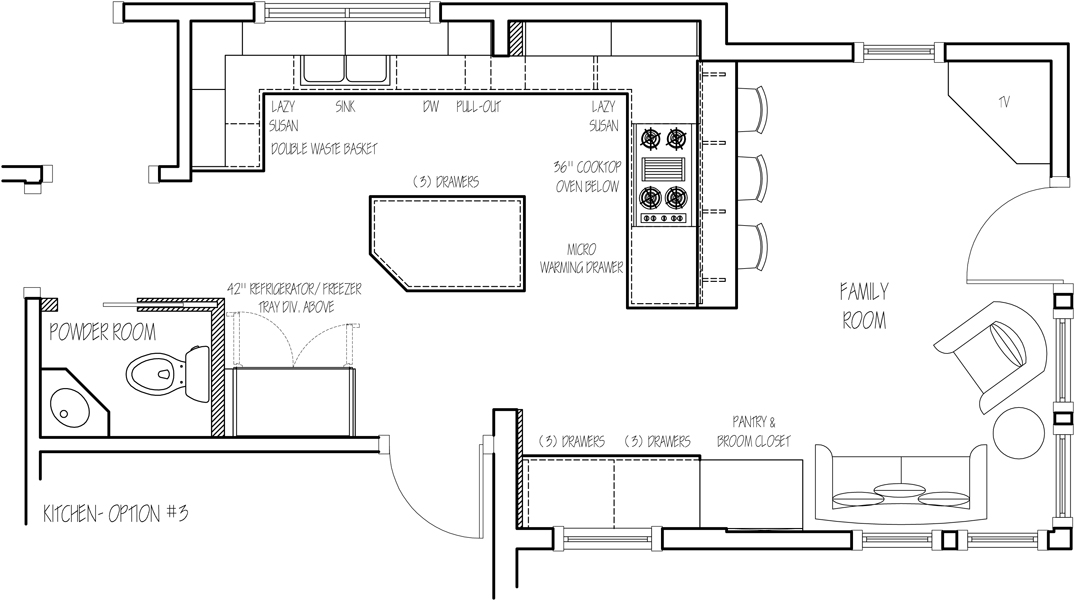
Floor Plan Option 3
Once you have selected a final floor plan, elevations usually follow – so you can see what the kitchen will look like in detail. Some firms will also provide a 3-D rendering or line drawing to help you visualize the space. In this case my client decided to utilize option 1 with a couple of elements that were suggested in the other 2 options.
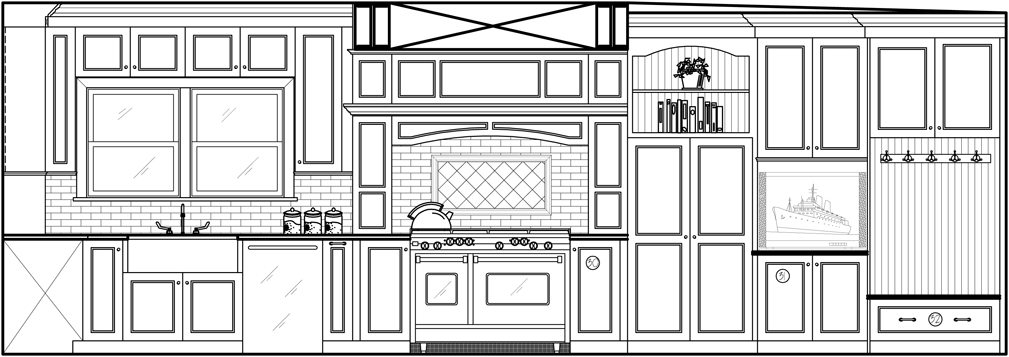
Range Wall Elevation from Final Drawing Set
Material Selection
After the final floor plan is determined it is time to look at materials including the cabinetry. Sometimes, there are inspirational pieces that drive the process from the beginning. Whether you have been basing the design on a particular idea, product or memento, or just starting from scratch, this is usually the exciting phase — the space starts to come alive with colors and patterns! Here is what my client and I chose for her kitchen project:
1 – The cabinets – White inset cabinets were chosen for the perimeter and Java glazed cherry cabinets for the island. Simple beaded recessed panel doors were selected to suit the 1920s style of the home.
2 – The countertops – Coast Green granite was selected to bring the two cabinet colors together and to add a contrasting hue to the palette.
3 – The appliances – A 48” dual-fuel range with 6 burners and a griddle became central hub for this cook who makes breakfasts almost daily for her family and enjoys entertaining often. A stainless steel built-in 42” refrigerator/freezer with a water/ice dispenser keeps all the ingredients fresh and makes it easy to get a drink of water. Stainless dishwasher with concealed controls continued the clean lines. A built-in microwave and an integrated warming drawer are concealed in the island to make more countertop space.
4 – The plumbing fixtures – A porcelain farmhouse sink suited the design. Antique-style two-handle faucet with a sprayer finished the combination.
5 – The backsplash – Tumbled marble subway tiles with an accented tile frame by the hood finish off the look.
6 – The lighting – Recessed cans provide general lighting. Undercabinet pucks provide task lighting and three pendants provide ambient/decorative lighting.
7 – The flooring – Radiant heat is underneath natural-stained oak floors throughout the kitchen and sitting area.
Make sure to read the next in this series Kitchen Remodeling: Part III – Final Scope, Cost and Scheduling by signing up for our email newsletter, below, or RSS feed in the far upper right hand corner of the website. And, as always, you can drop us a line with any questions you might have regarding this information or your kitchen project by clicking on this link.